Instructions for use
Advance preparation
Please prepare the following when completing the procedure.
- ・ iOS devices using Gigako eSIM
- ・ Wi-Fi and other networks
- ・ Device that displays the QR code (PC/tablet/smartphone, etc.) *
* Required to display the QR code. If you do not have it, initial settings will be made by entering the code.
How to use iOS devices
■ How to set up by reading the QR code and entering information manually
Please operate on a device that displays the QR code, such as a PC/tablet/smartphone (or the device you want to connect to if entering data manually).
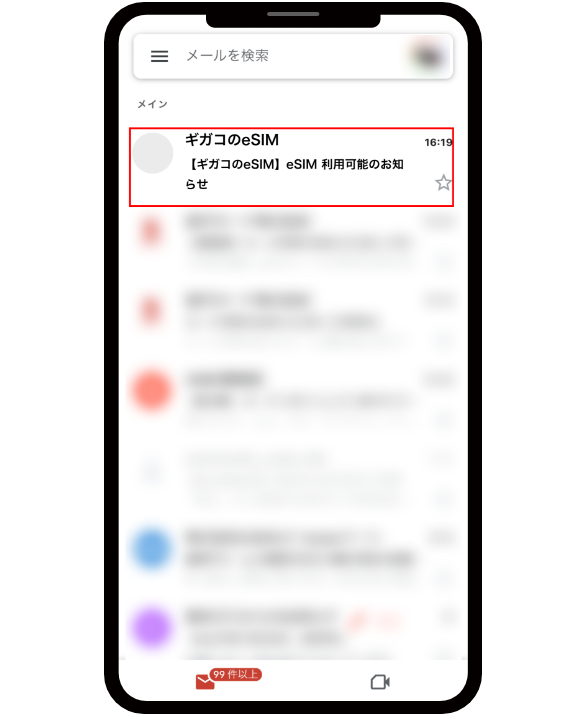
After completing your eSIM application, you will receive an email with the subject "【Gigaco eSIM】eSIM now available".
Please proceed to "My Page" from the URL included in the email.
* If you purchase an eSIM between 10pm on Tuesday and 9am on Wednesday, orders will be placed sequentially after 9am on Wednesday. You will be notified via email once your eSIM has been activated.
* You will receive an email notifying you of your eSIM usage procedure in as little as 10 minutes.
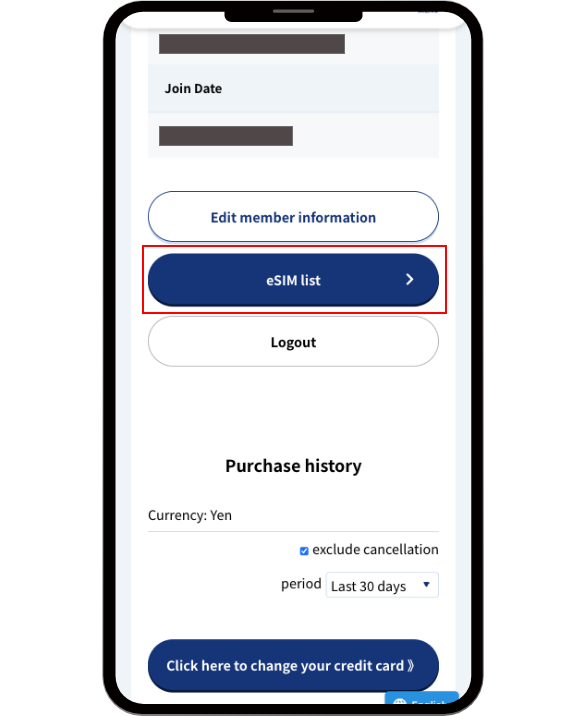
Select "eSIM List" from My Page.
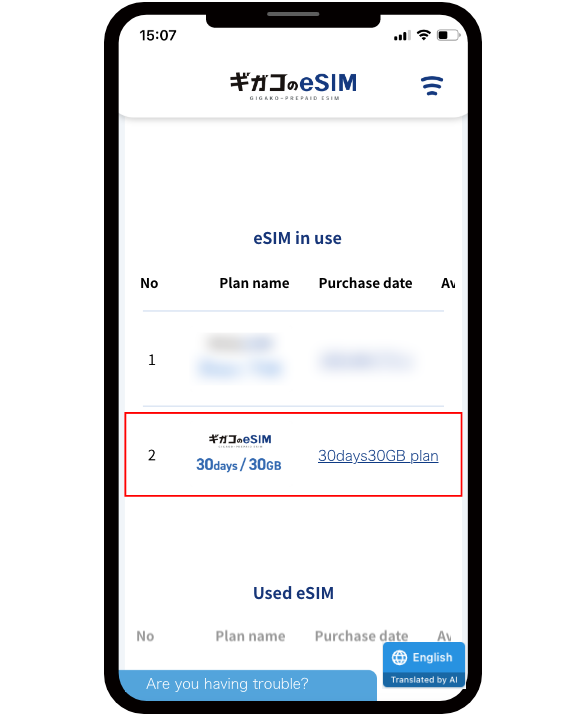
Select the eSIM plan you plan to use.
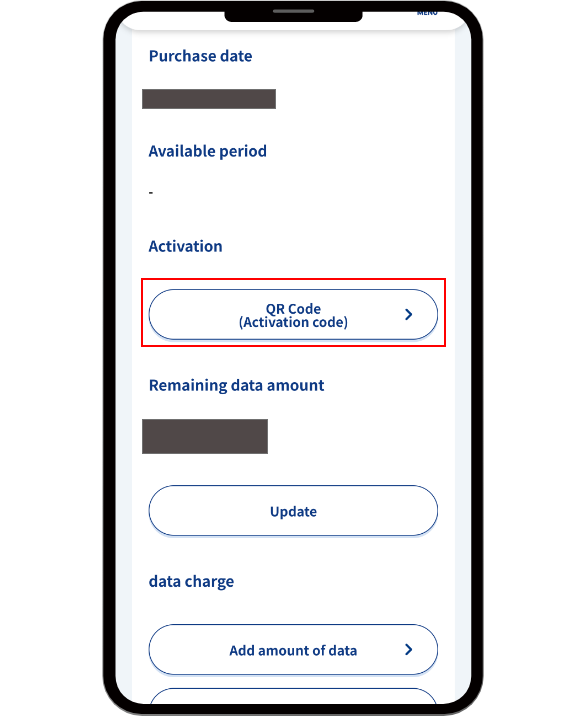
Select the Activation "QR Code" button to display the QR Code activation code.
* The "QR Code" button will be displayed once the activation code has been issued.
* Until the activation code is issued, the status will be "Activation issuance in progress."
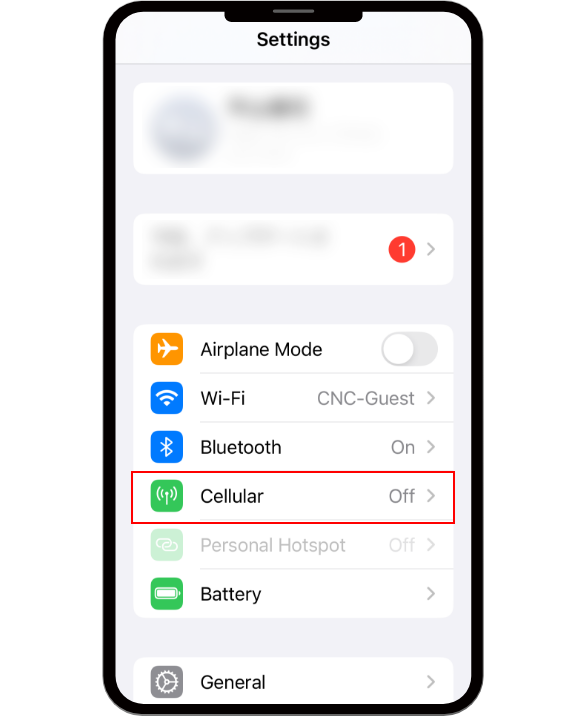
Connect your iPhone/iPad to Wi-Fi and select "Settings" → "Cellular Data".
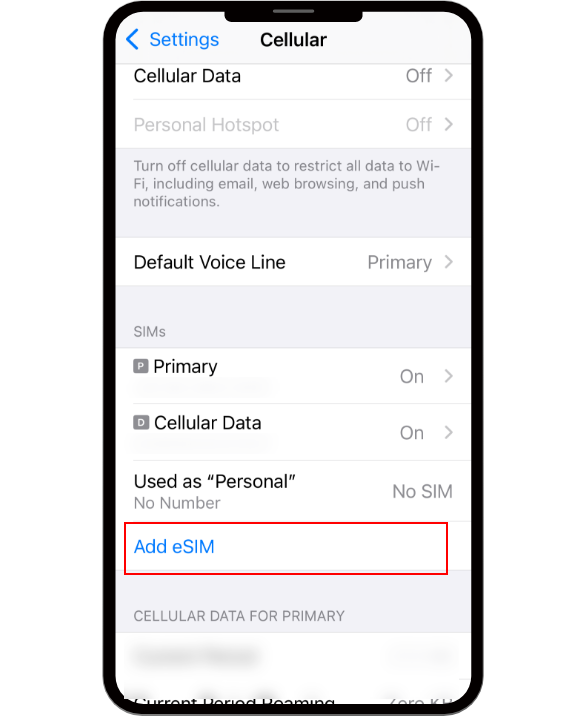
Select Add eSIM.
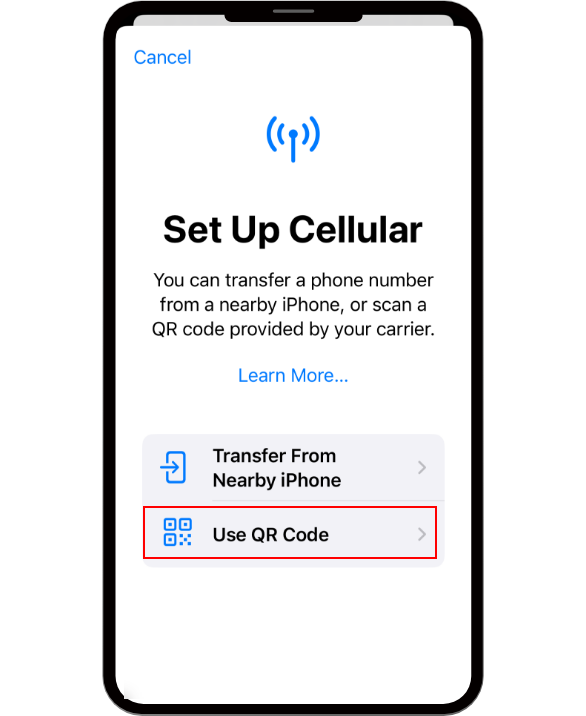
Select "Use QR code".
* Data eSIMs do not support "Transfer from a nearby iPhone/iPad (eSIM Quick Transfer)."
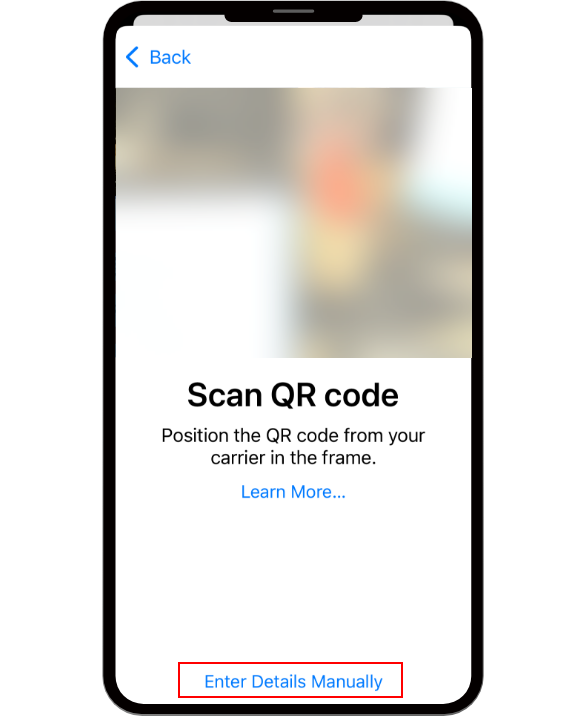
The camera will start up, so read the QR code displayed on your PC/tablet/smartphone or other device that displays QR codes.
* Data eSIMs do not support "Transfer from a nearby iPhone/iPad (eSIM Quick Transfer)."

When performing initial settings on only one device
Select Enter details manually.
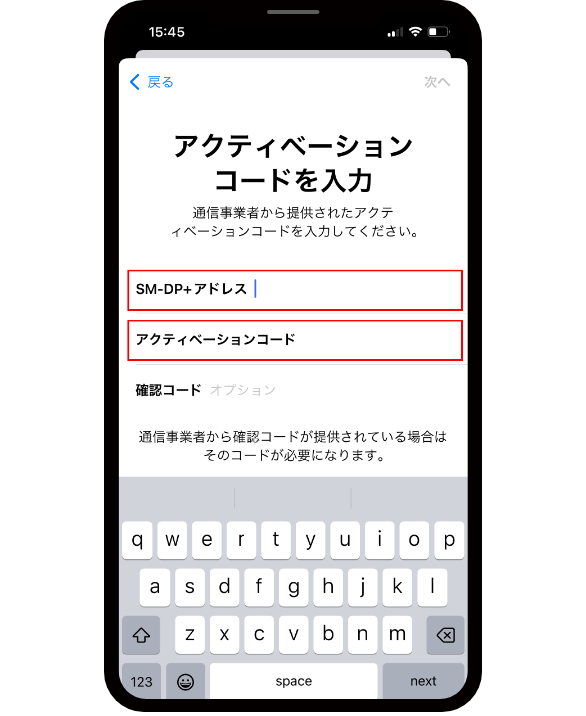
When performing initial settings on only one device
① Enter the SM-DP+ address.
② Enter the activation code.
③ Select “Next”.
*There is no need to enter a confirmation code.
* The SM-DP+ address and activation code can be checked on the "QR Code" page in the eSIM details page of your My Page.
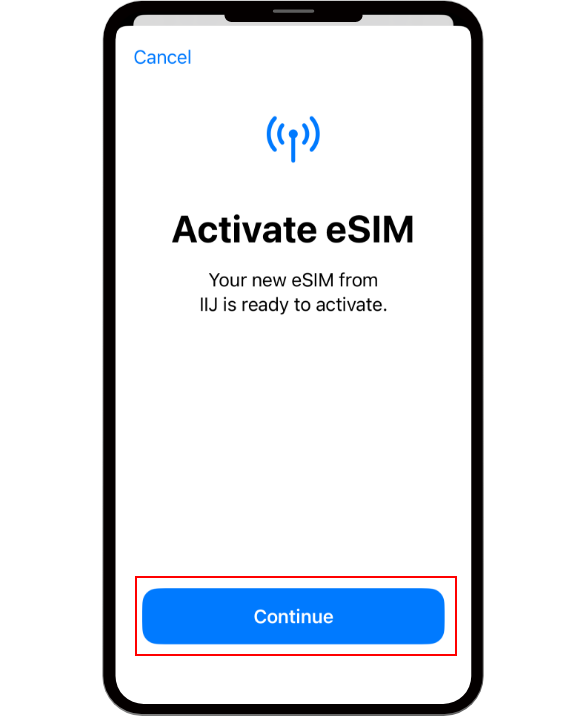
Select "Continue".
* "Activating" or "Connecting to network" may be displayed for about 5 minutes. Wait until the "Mobile communication settings complete" screen is displayed.
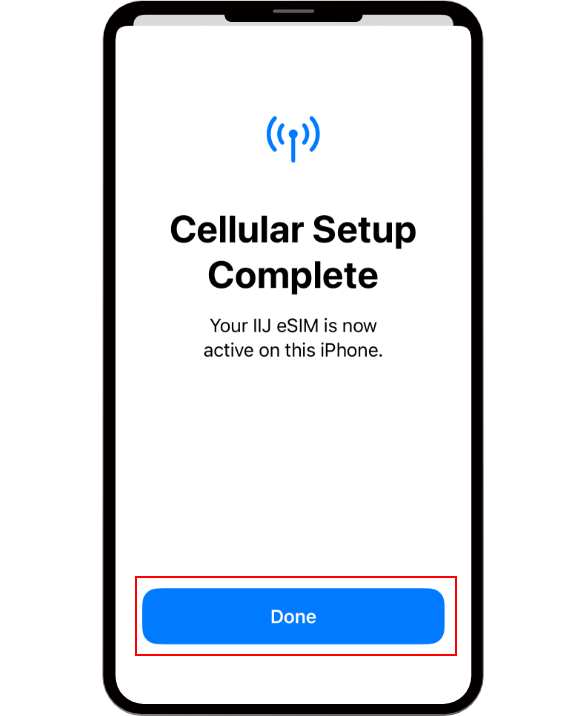
Select Done.
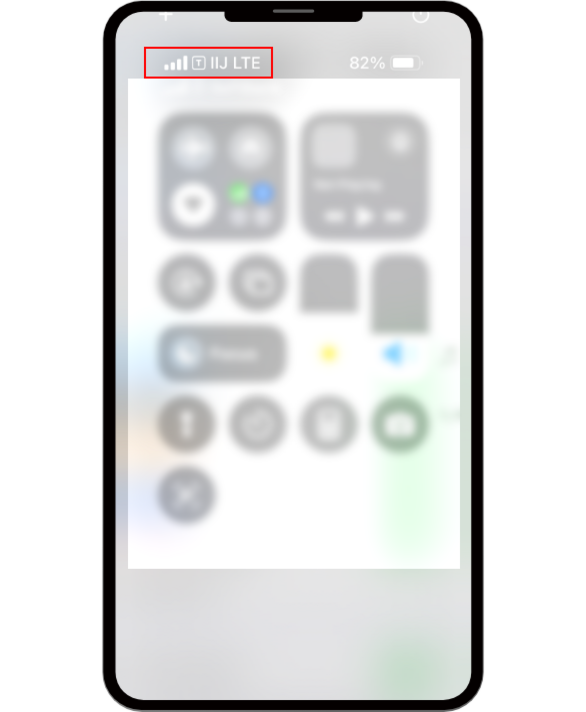
Perform a mobile data test.
If the antenna icon is displayed correctly after turning off Wi-Fi, the setup is complete.
If you cannot confirm this, please restart your device.
* It may take a few minutes for the antenna icon to be displayed correctly.


